I ran into a situation today where I needed to test if an application worked before pointing the DNS records to the new infrastructure.
At work (Padmission), we have an application running on Laravel Vapor. To meet some compliance requirements, I was tasked with setting up a new infrastructure for our application using EC2 instances and an Application Load Balancer.
The tricky part is that one of our clients managed the DNS for this server. We didn’t want to tell them to point the DNS only to find a problem and ask them to revert it while we worked on a fix. So we had to test the application/infrastructure before asking them to adjust their DNS.
To complicate matters, we couldn’t just access the application via the load balancer hostname because the application uses domain resolution for tenant checking and session management. Visiting the application with the wrong domain would not work. We had to test the application using the production domain.
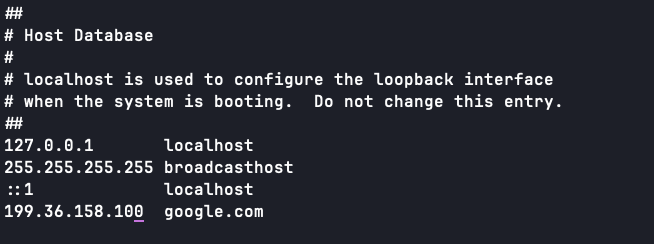
Typically, on *nix based systems, you can just go to your /etc/hosts file and add an entry for a domain name and point it to an IP address. This will direct any request for that domain the given IP address. You can do it for any domain, google.com, facebook.com, whatever.
The thing is, this only works for IP addresses (A records). If you need to do this for something that requires a CNAME/Alias record, like an AWS load balancer, this won’t work.
If you need to do this locally, I am going to save you hours of time (even AI struggled getting me there). This is how you CNAME a DNS record for your local machine:
We are going to pretend that we are doing this for the domain patrickstephan.me
1. Quit Herd (or Valet), if you use it
If you’re developing Laravel applications, there’s a good chance you use Herd. You’ll need to quit it.
2. Install dnsmasq via Homebrew
Yes, yes, I know you don’t want to, you can remove it and take a shower later. But you have to do it, and you can’t use Herd’s installation of dnsmasq. Or maybe you can. I couldn’t figure it out. If you do, please tell me how you did it.
You can find instructions for installing Homebrew here: https://brew.sh/
You can find instructions for installing dnsmasq here: https://formulae.brew.sh/formula/dnsmasq
3. Add a resolver file
A resolver file essentially tells your operating system where to look for DNS records for specific TLDs or domains. We need to tell it to look for records for our domain on our local machine (instead of a DNS server). We do this by creating a file with the root domain as the name of the file. In this case, that would be /etc/resolver/patrickstephan.me. Then set the contents of the file to:
nameserver 127.0.0.14. Add a CNAME record to dnsmasq
If you installed dnsmasq following the instructions above, then the dnsmasq.conf file will be located at /opt/homebrew/etc/dnsmasq.conf. If you just installed dnsmasq and haven’t made any changes to the conf file, then you will find that it is pretty much just full of documentation. You will need to truncate the file (echo "" > /opt/homebrew/etc/dnsmasq.conf) and then set the contents to:
listen-address=127.0.0.1
cname=patrickstephan.me,<wherever_you_need_to_point_your_domain.com>
{
"object": "block",
"id": "2cf76197-fafa-8088-88ec-e18cb4e03c76",
"parent": {
"type": "page_id",
"page_id": "2ce76197-fafa-80ca-8e85-cf2fe5f15078"
},
"created_time": "2025-12-20T05:19:00.000Z",
"last_edited_time": "2025-12-20T05:19:00.000Z",
"created_by": {
"object": "user",
"id": "e3b03944-d8f2-4d66-9775-857ba5e10ece"
},
"last_edited_by": {
"object": "user",
"id": "e3b03944-d8f2-4d66-9775-857ba5e10ece"
},
"has_children": true,
"archived": false,
"in_trash": false,
"type": "synced_block",
"synced_block": {
"synced_from": null
},
"children": [
{
"object": "block",
"id": "2ce76197-fafa-8080-a05e-cf7179033615",
"parent": {
"type": "block_id",
"block_id": "2cf76197-fafa-8088-88ec-e18cb4e03c76"
},
"created_time": "2025-12-19T22:45:00.000Z",
"last_edited_time": "2025-12-20T05:19:00.000Z",
"created_by": {
"object": "user",
"id": "e3b03944-d8f2-4d66-9775-857ba5e10ece"
},
"last_edited_by": {
"object": "user",
"id": "e3b03944-d8f2-4d66-9775-857ba5e10ece"
},
"has_children": false,
"archived": false,
"in_trash": false,
"type": "heading_2",
"heading_2": {
"is_toggleable": false,
"color": "default",
"text": [
{
"type": "text",
"text": {
"content": "5. Make some small changes to your Wi-Fi settings",
"link": null
},
"annotations": {
"bold": false,
"italic": false,
"strikethrough": false,
"underline": false,
"code": false,
"color": "default"
},
"plain_text": "5. Make some small changes to your Wi-Fi settings",
"href": null
}
]
},
"children": []
}
]
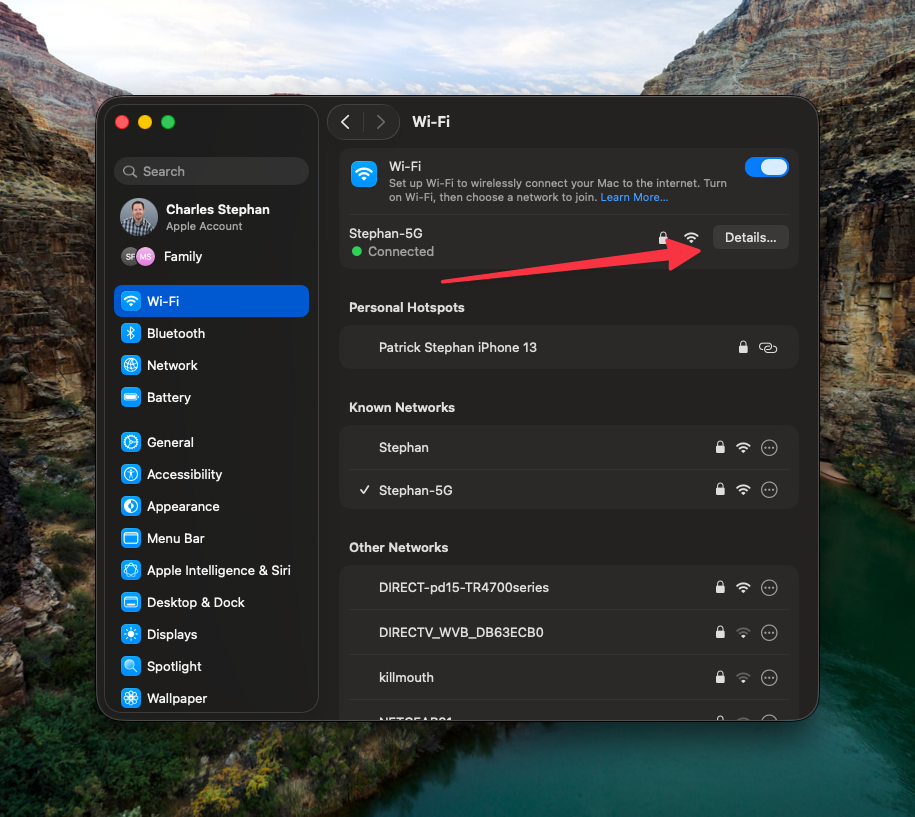
}I use a Mac (macOS 26 Tahoe), this step assumes you use a Mac. If you don’t use a Mac you can attempt to skip this step, and things might work for you. They might not. If they don’t work, I don’t know what to do to make them work. But you can copy these instructions, paste them into ChatGPT (or your AI of choice), and ask it to adjust the instructions for your OS.
Open System Settings and navigate to “Wi-Fi”. For your current Wi-Fi network, click on “details”, and turn off “IP Tracking”

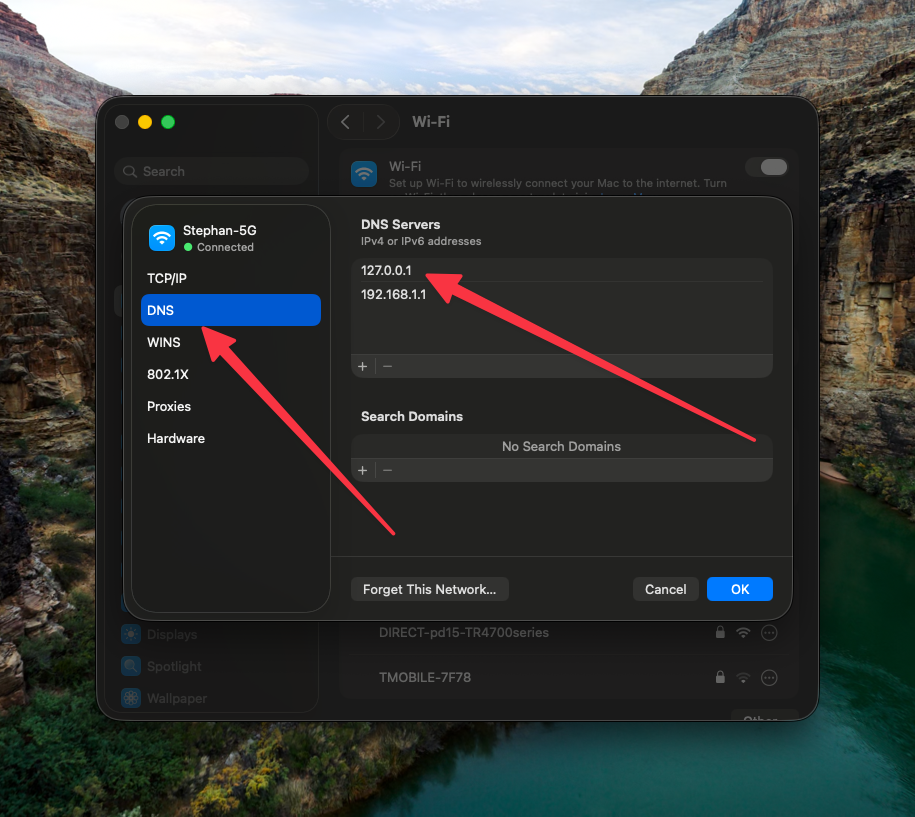
Then navigate to the DNS tab and add an entry for 127.0.0.1 to the “DNS Servers” list. Make sure it’s at the top:
6. Clear your DNS Cache and start dnsmasq
The following commands will clear any cached DNS records on your machine and allow dnsmasq to handle DNS resolution for any domains in the dnsmasq.conf file.
sudo brew services start dnsmasq
sudo dscacheutil -flushcache
sudo killall -HUP mDNSResponder
sudo killall -HUP mDNSResponderHelper 2>/dev/null
7. Test
Once you’ve cleared the cache and started dnsmasq, you can test your changes by visiting the URL in the browser. However, if you did everything right, you won’t be able to tell if you’ve set everything up right, because the site should look exactly the same. However, there are a couple things you can do:
- Check the DNS routing
If you run the command
dig <domain>, you will get a report of where your computer sees the DNS records pointing. If the DNS record points to the old location, something didn’t work right. If, however, you see the following 2 entries, then it’s working:SERVER: 127.0.0.1#53A CNAME pointing to the new location
- You can also make a change to the application on the new infrastructure. For me, I just changed the site name, so I could see in the browser tab, if I had the new or old infrastructure open
8. Reverting
Once you’re done testing or are ready to push things live, you’ll want to undo a lot of these changes:
- Stop the
dnsmasqservice:sudo brew services stop dnsmasq
- Undo the changes to your Wi-Fi settings
- Revert the dnsmasq changes and resolver file.
- If you want, uninstall
dnsmasq
And that’s it. I hope you find it useful.